
Create outbound campaigns
Outbound campaigns let you send targeted one-off or scheduled emails to people on your subscriber lists. Use them for event invitations, replay announcements, product updates, nurture emails, and follow-up sequences.
Create a new campaign
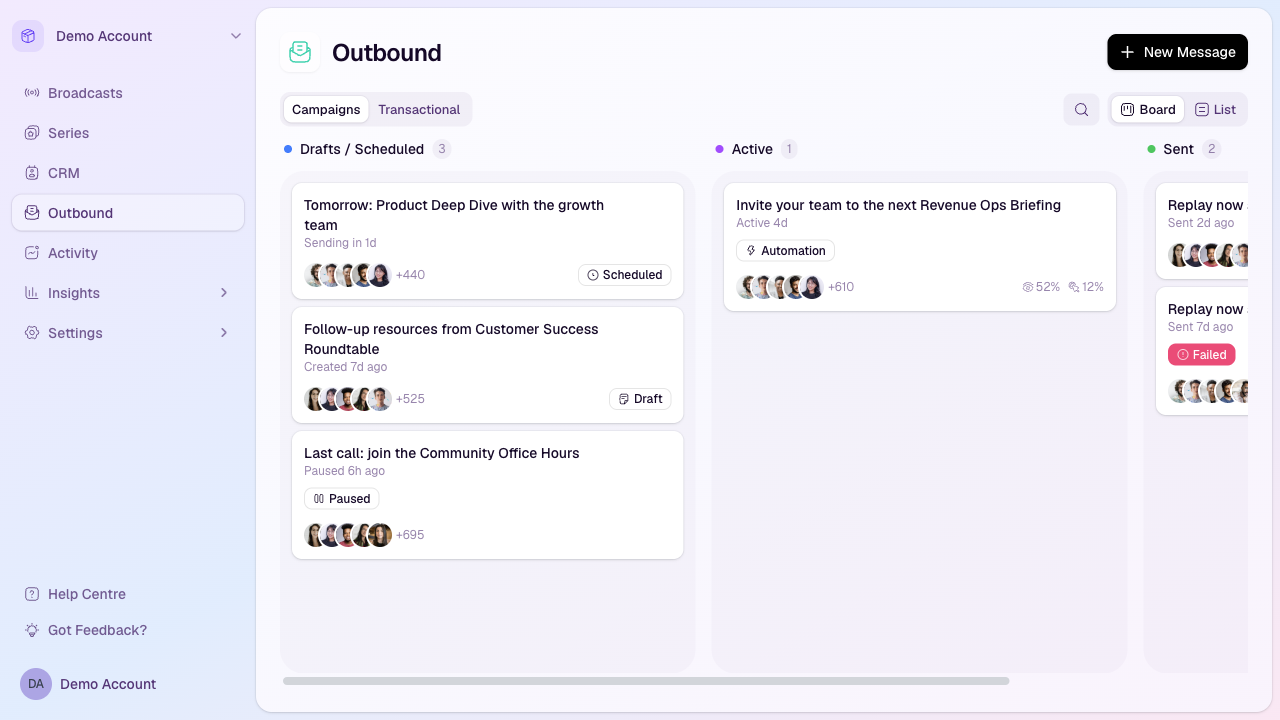
Open Outbound from the workspace sidebar.
Stay on the Campaigns tab.
Select New Message.
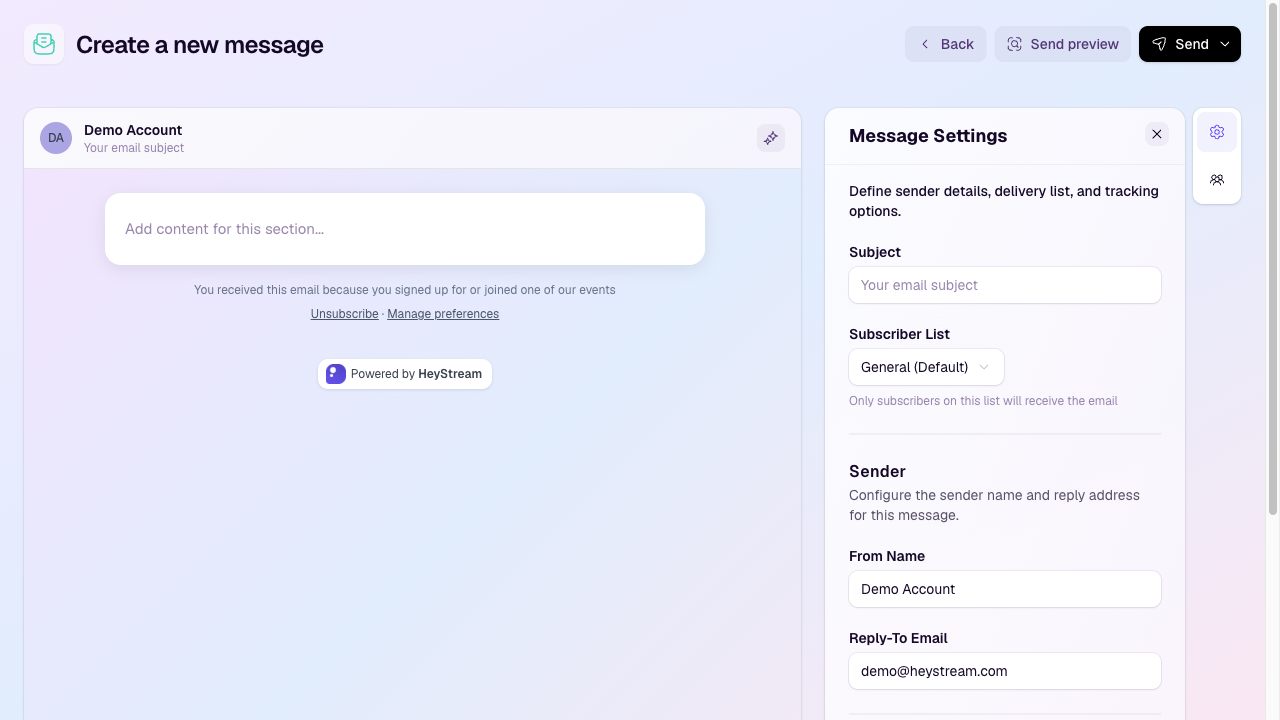
Write your email content in the editor.
Open Message Settings to add the subject, subscriber list, sender name, reply-to email, and tracking preferences.
Open Audience to choose who should receive the message.
Send yourself a preview before sending to the audience.
Use Send now to send immediately, or Schedule to choose a later delivery time.
Campaign states
Drafts and scheduled messages appear in Drafts / Scheduled.
Messages currently sending or running as automations appear in Active.
Completed sends appear in Sent with engagement metrics where available.
Before you send
Sending campaigns and preview emails requires the workspace owner's account email to be confirmed and their paid plan to be active after the trial. Drafting or scheduling a message does not bypass these requirements: the account must also be eligible when the email is sent. If an action is blocked, follow Confirm email, View trial, or View billing as shown in HeyStream. If you are a teammate, ask the workspace owner to confirm the owner's email address or resolve the account's billing status.
Confirm the subject and sender details are final.
Check that the subscriber list is correct.
Review the audience estimate so you know who is included.
Use the preview email to verify links, layout, merge fields, and tone.